- Get Started
- Learning
- Products
- Blog
- Beginner
For first time users of chipKIT modules. - Intermediate
For users who have a moderate exposure with chipKIT modules. - Advanced
For users who are experts with chipKIT modules. - Developers
- About Us
- Support
ChipKIT Lenny
| chipKIT Lenny | |
|---|---|
 | |
| Specifications | |
| Controller | PIC32MX270F256D |
| Flash | 256KB |
| SRAM | 64KB |
| Speed | 40MHz |
| Information | |
| Board Define | _BOARD_LENNY_ |
| Links | |
| Manufacturer | Majenko Technologies |
| Product Page | majenko.co.uk/lenny |
| User Guide | DS1184.pdf |
| Tech Support | chipkit.net/forum |
| Bootloader HEX | MAJENKO_LENNY_40MHZ.hex |
| Purchase From | majenko.co.uk/lenny microchipDIRECT.com |
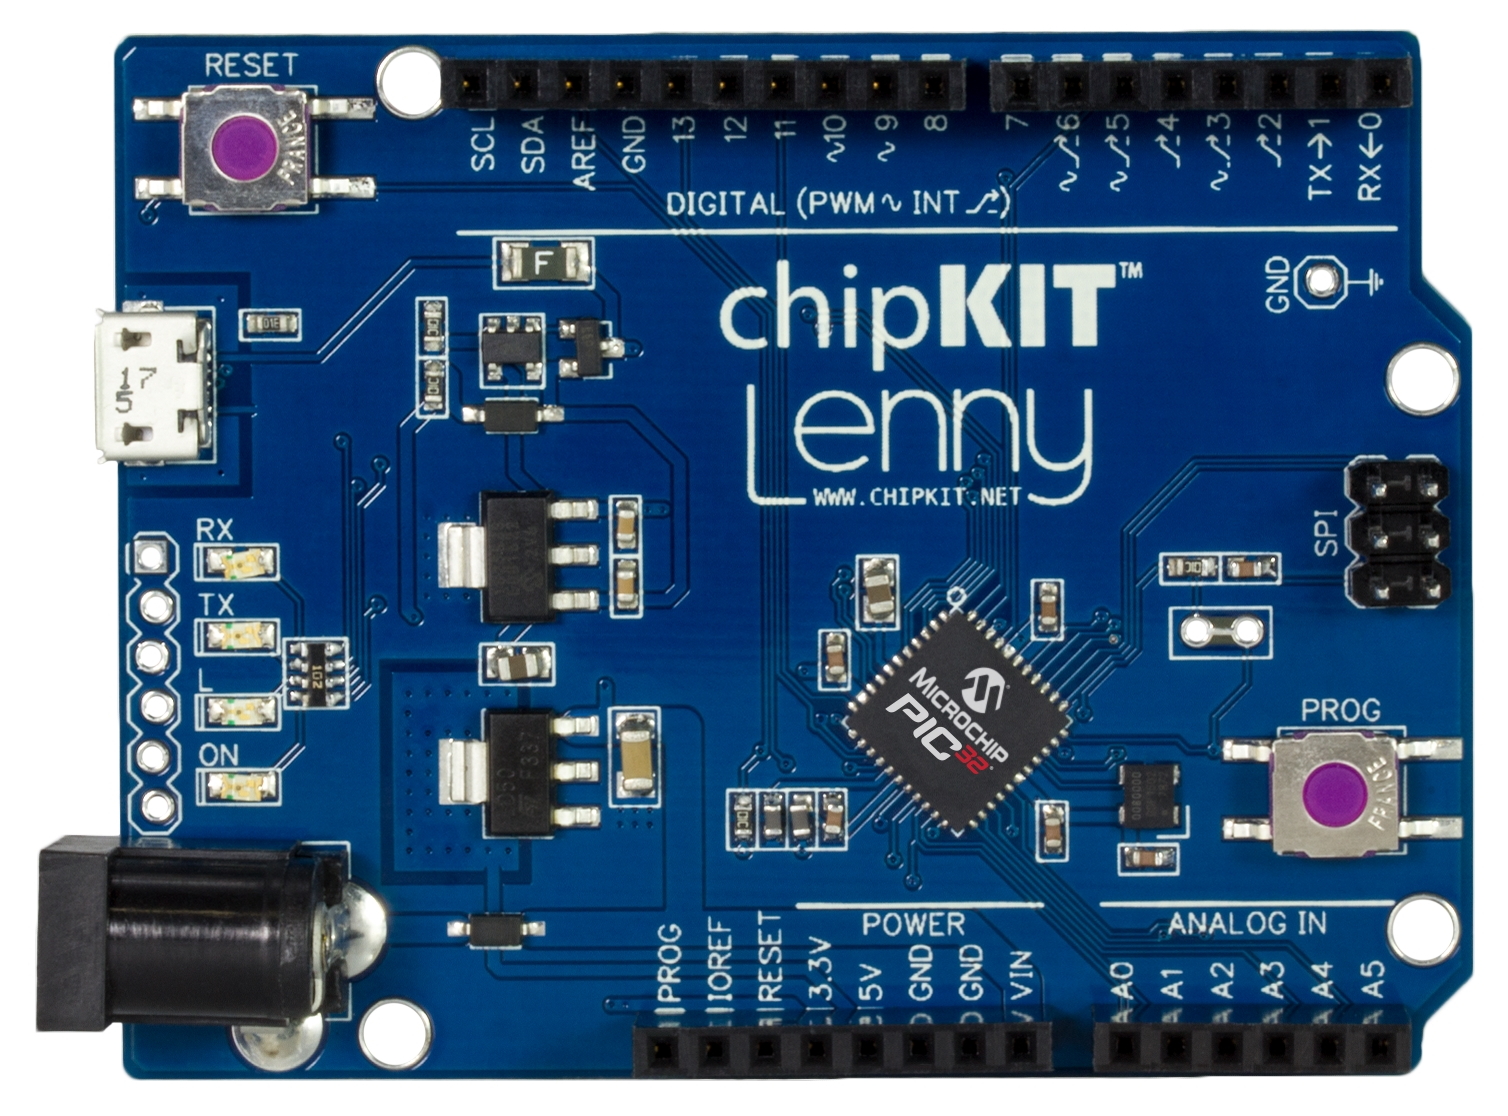
The chipKIT Lenny is designed to be as close to the Arduino Leonardo as physically possible. The choice of microcontroller, the PIC32MX270F256D with advanced Peripheral Pin Select, means GPIO pin functions can be mapped to match those of common Arduino boards. By default that mapping is configured to be equivalent to the Arduino Leonardo.
The Board Design
- PIC32MX270F256D - 256K Flash, 64K RAM @ 40MHz 32-bit MIPS core
- UECIDE supports chipKIT Lenny out of the box
- 27 Digital IO (many are 5V tolerant)
- 6 Analog inputs (10-bit)
- 2 hardware serial ports (UARTs) - one accessible on pins 0 (RX) and 1 (TX), the other on pins 2 (TX) and 4 (RX), plus a serial connection over USB (12Mbps)
- Uno R3 / Leonardo footprint
- Directly compatible with 3.3V devices. No level converting necessary.
- Easy to program, no additional hardware is required to load sketches – just plug into a USB port and run UECIDE
- ICSP Header for use with optional Microchip hardware programmer/debuggers (like PICKit3, ICD3 or REAL ICE)
- Can be powered through USB, or 6.5V to 12V DC input power
- USB bootloader (STK500v2 compatible) for seamless sketch uploading within UECIDE
Useful Board Pins
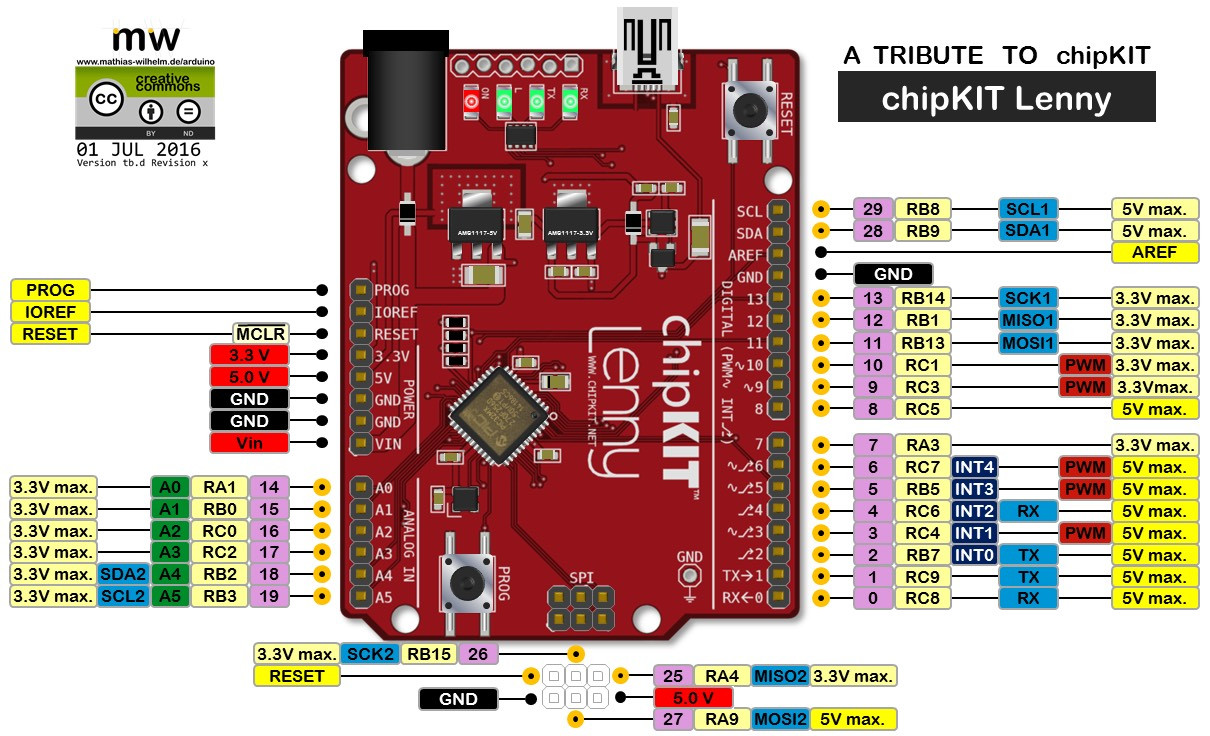
Full Pin Layout

LEDs
LED L is on digital pin 22. LED TX is on digital pin 23. LED RX is on digital pin 24. Power (ON) LED is on 3.3V power.
Analog Inputs
| Analog Input | Digital Pin |
|---|---|
| A0 | 14 |
| A1 | 15 |
| A2 | 16 |
| A3 | 17 |
| A4 | 18 |
| A5 | 19 |
Serial Objects
| Serial Object | UART | TX Pin | RX Pin |
|---|---|---|---|
| Serial | USB | none | none |
| Serial0 | UART1 | 1 | 0 |
| Serial1 | UART2 | 2 | 4 |
I2C
| I2C Object | Channel | SDA Pin | SCL Pin |
|---|---|---|---|
| DTWI0 / Wire | 1 | SDA (28) | SCL (29) |
| DTWI1 | 2 | A4 | A5 |
SPI
| SPI Object | Channel | MOSI Pin | MISO Pin | SCK Pin |
|---|---|---|---|---|
| DSPI0 / SPI | 1 | 11 | 12 | 13 |
| DSPI1 | 2 | 27 | 25 | 26 |
Bootloader Button
The PROG button used to enter bootloader mode is on digital IO 21. By default it is connected to the FastProg circuit to allow rapid single-finger access to the bootloader. This may be disabled by cutting the link adjacent to the PROG button.
Bootloading
When you want to upload a new sketch to the chipKIT Lenny, you need to put it into bootloader mode. This is done by simply tapping the PROG button.
If FastProg has been disabled you should instead hold the PROG button whilst briefly pressing the RESET button.
The LED "L" should start blinking to indicate the bootloader is running.
USB Device
To get the most out of the Lenny you will want to install the USB Device Library. This allows you to use the Lenny (and similar direct-USB boards) as:
- USB Serial Interface (CDC/ACM)
- Keyboard
- Mouse
- Joystick
- MIDI Interface
- Raw HID
FAQ
The computer doesn't detect my Lenny when it's plugged in. Is it broken?
No, it's not broken. The USB interface is only active when either the bootloader is running or your sketch has specifically requested that it be used through the use of, for example, "Serial.begin(115200);". If your sketch (such as the default Blink sketch) doesn't use the USB interface then the computer won't see the board at all. Pressing the PROG button will enter the bootloader and the computer should then see the board as a COM port.
